

Build a simple Dashboard with Retool and DynamoDB


Low-Code development platforms provide a very flexible and robust way to create applications. A developer with experience in custom development feels more comfortable while working with these tools. These tools also provide on-prem and cloud-based hosting against your custom domain, so you can say that it is a complete package from development to deployment.
What is Retool?
Retool is a Low-Code development platform focusing on building internal tools for your organization. They have many components that you can drag and drop to make your whole customized dashboard. The following features are shipped when you create a trial or paid account.
- Cloud and on-Prem hosting plan.
- Flexible UI components, especially tables and charts.
- You can integrate your dashboard with dozens of databases, APIs, Google sheets and custom APIs
- You can write JavaScript with ES6 format to handle and manipulate data sets inside Retool.
- You can control user-level access as well as component level access. A complete built-in layer of security and role management is available.
Okay, but how does this work?
Let's start creating a simple dashboard with the integration of DynamoDB. DynamoDB is AWS managed no-SQL database. You can create your database by signing up on AWS with a free tier.
Step-1 (Integration)
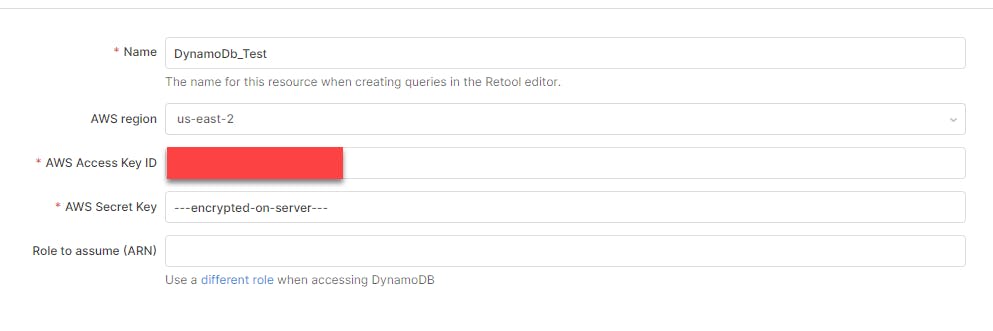
After signing up on Retool, you will see a popup for integration. Don't worry if you missed that. Just navigate to the Resources tab and select DynamoDB as an option. You have to provide your Access key and secret key. You can copy this information under your AWS IAM role.
Step-2 (Internal Dashboard development)
Click on Create New Dropdown and select APP as an option.

Name that application (whatever you like), and it will redirect you to the application development page.
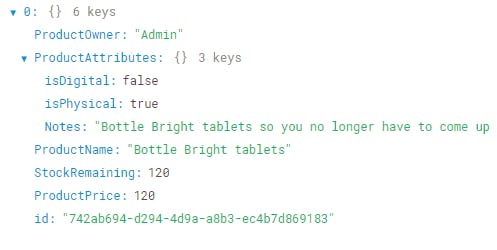
In my case, I have only one "Product" table, and I will write a CRUD operation on top of that Table. Please have a look at this Table's schema.
Step-3 (Read Data)
First, grab a table from your right side panel into the main canvas, then from the Query editor, select a query and choose your DynamoDB resource. Then you will be able to see a screen like the below Screenshot.
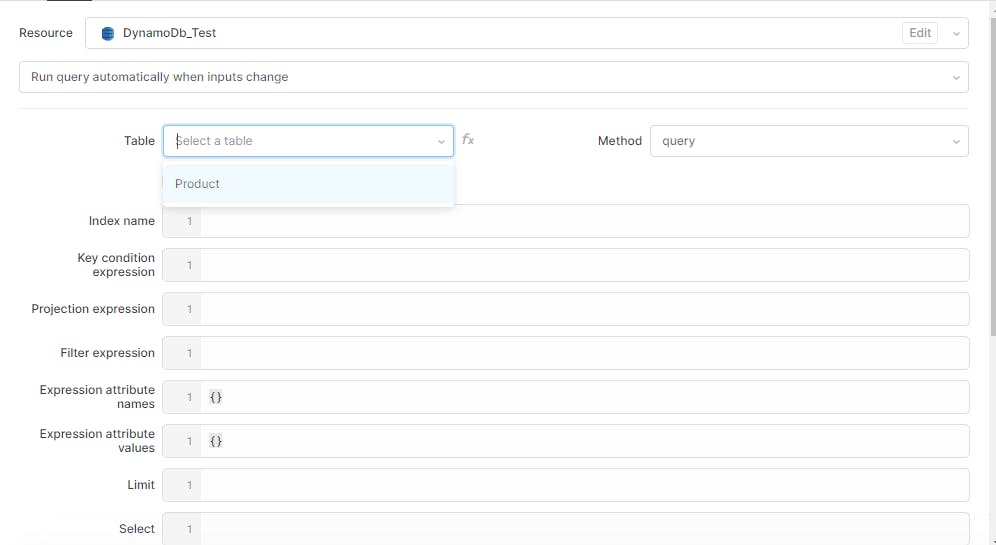
Select your Table and Method. For the reading operation, we will choose the scan method. Now Also grab a text input control on top of your table component. As you can see from my database schema, I have the product name field and the remaining stock field. I will use these two fields to filter data. Rename your Query to "getAllProducts" or whatever you like, and write a filter expression. In my case, I will bind my text input with this filter expression. So that when a user searches for something, it will search those records that contain that search string. You can find more details about this filter expression on DynamoDB documentation.

Now bind your get records Query to your Table.
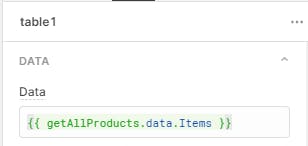
Retool has build-in data property against every Query. If your data reside in a nested JSON array, you must pass that object or array reference. As you can see here, I am using Items after a data object.
Step-3 (View Data)
As per my Table's schema, Retool will show data in the following format.

But this is not human readable. We have to add show data in plain format. Let's start exploring Retool's custom columns power.
Click Add button next to the columns section, and by using the current row property, you can access the nested JSON property of your Table. Great! Without writing any complex JS, you can extract a nested JSON property.
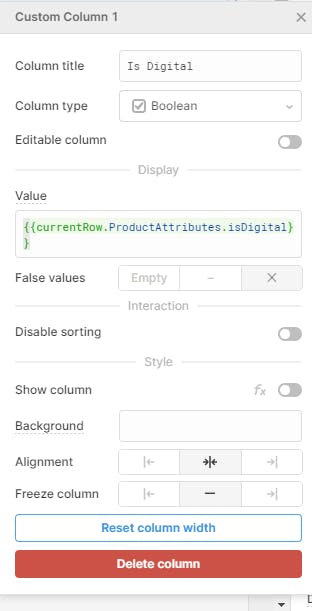
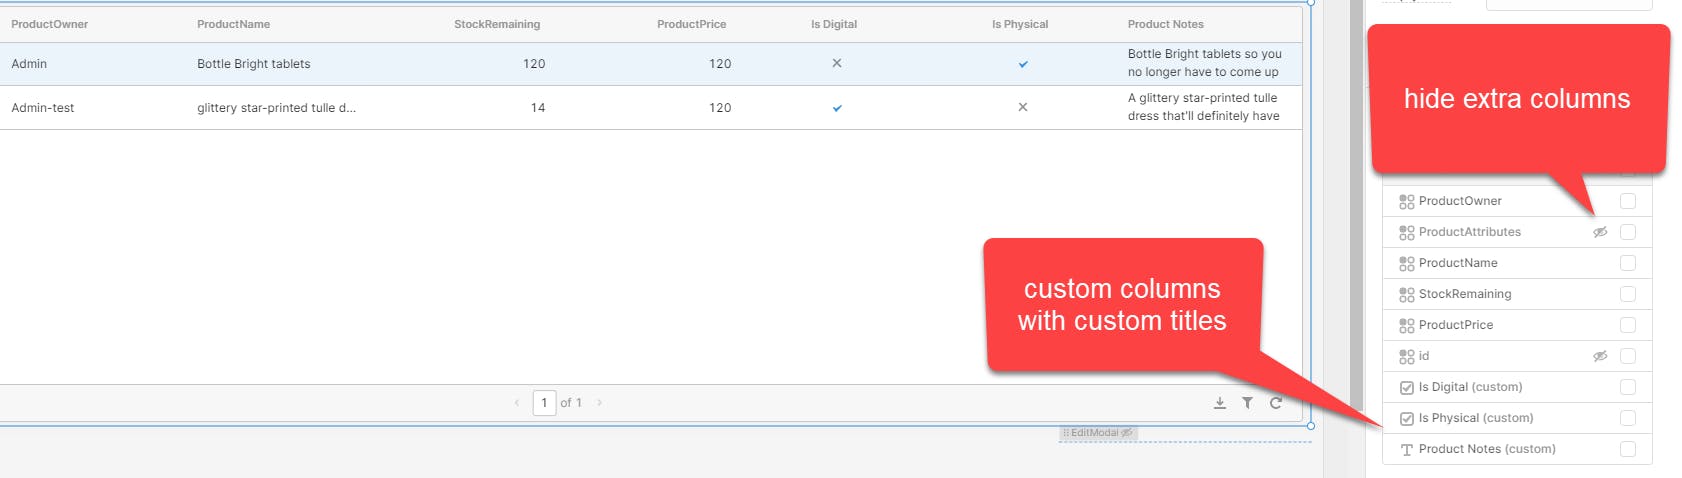
You can change the column type and False values option from the above Screenshot. I have added three nested columns as a custom column, and now my Table looks more human-readable.
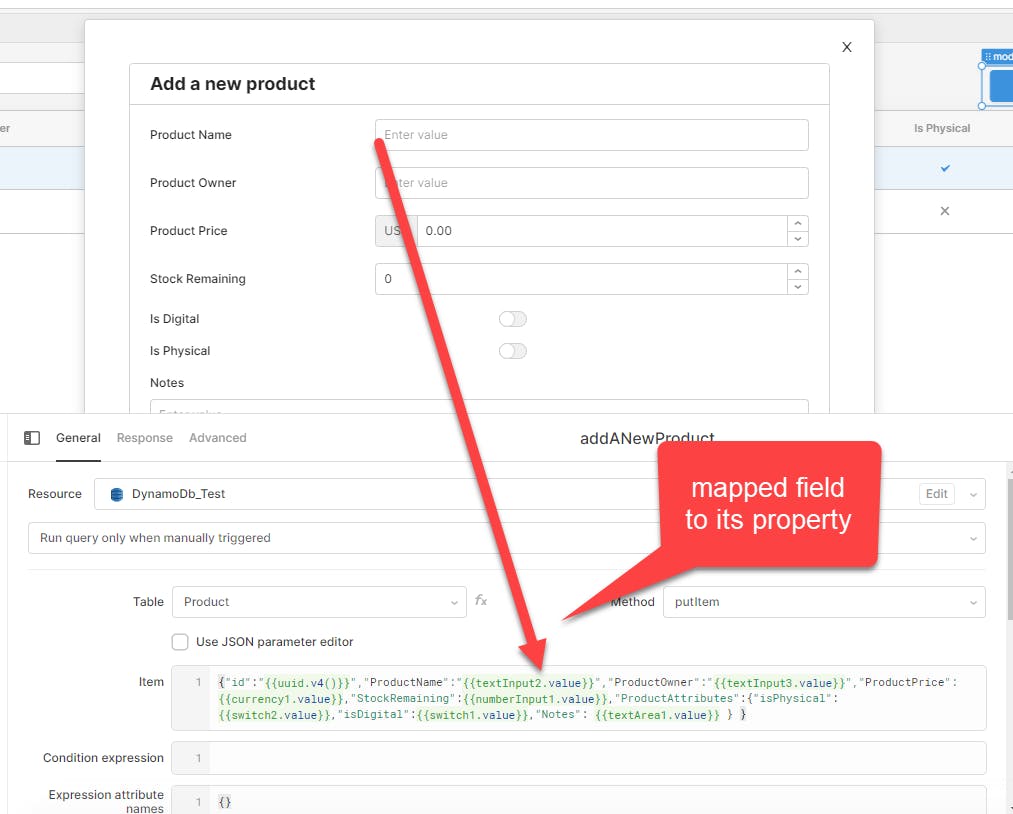
Step-4 (Add Data)
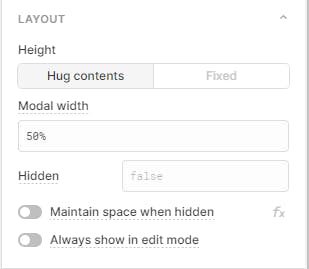
Drag a Modal from the right-side panel and rename it "Add a new Product". Under the Layout option, change the following settings.
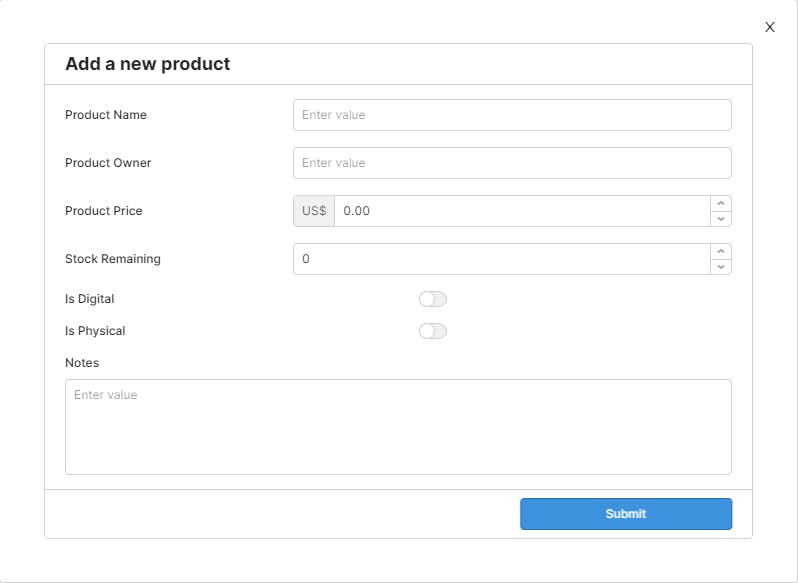
Now drag a form component inside Modal and appropriate fields into the form component. I set up my form according to my database schema.
Step-5 (Add Query)
Now add a new query to insert records into the database. You have to put string quotations against string values, but you don't need to put quotes for integers and numbers.
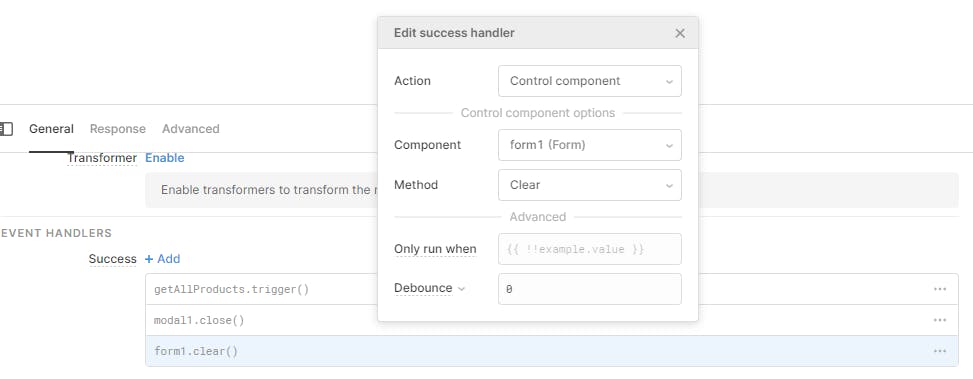
We have to define some event handles after running this Query successfully.
- Get a newly added records from the database
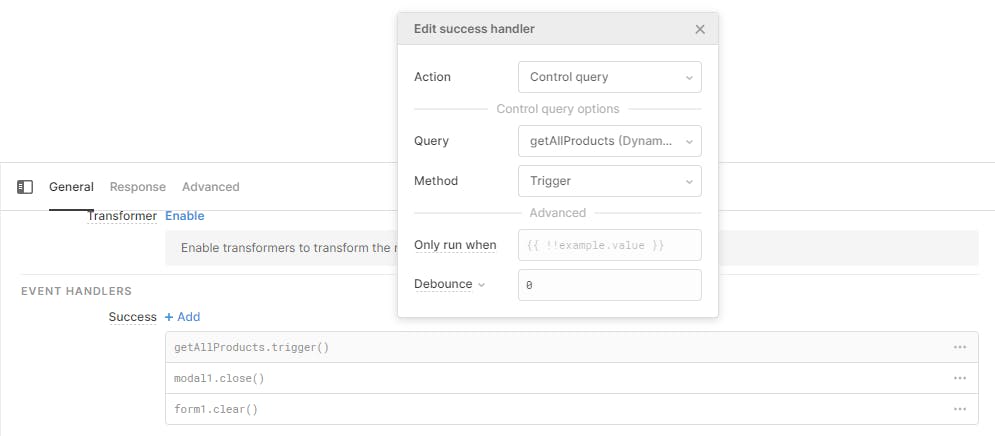
- Close Modal
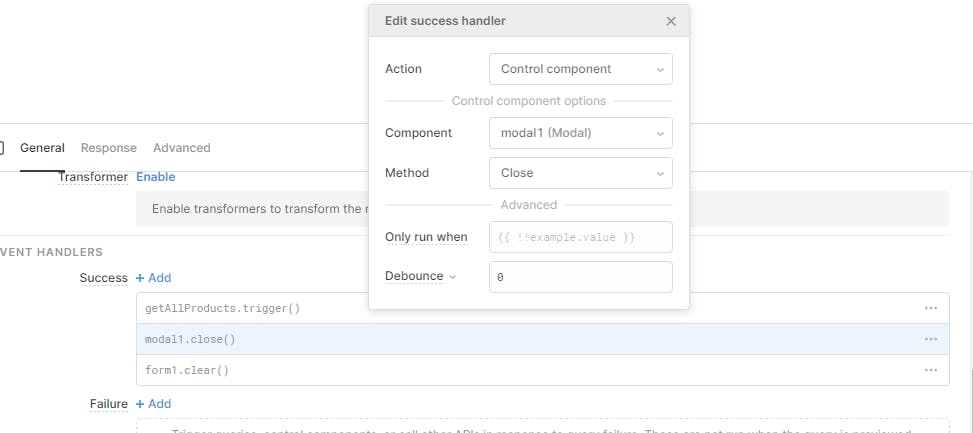
- Clear Form
Step-6 (Update Record)
Updating a record is a bit tricky. First, grab a modal to the canvas and set its layout settings.
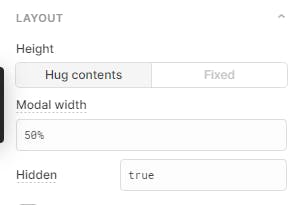
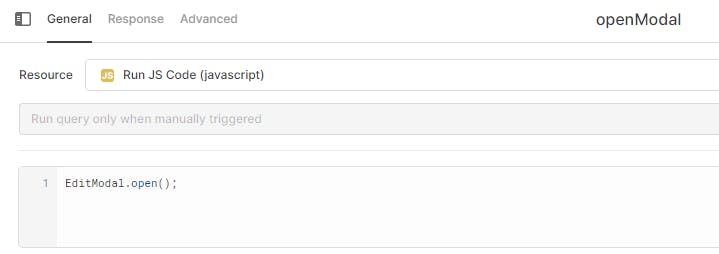
We will hide this modal and only opens up on demand. Write a JS query for opening this modal.
Now create an update action under your table Actions section. And bind this Query with that Action.
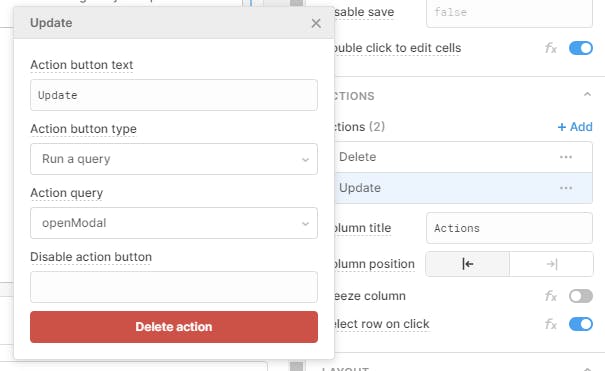
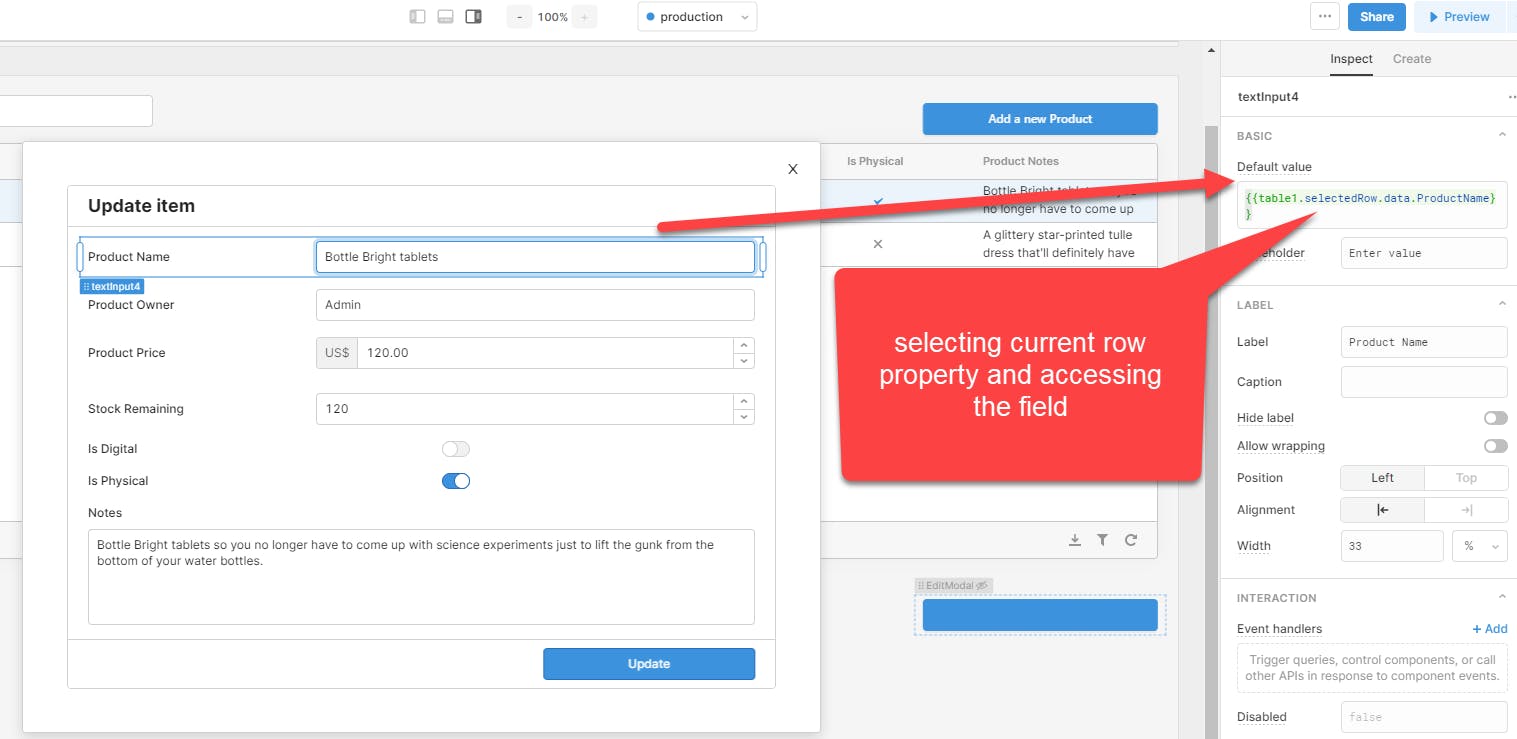
You will see an Action column in your Table with an Update title. Now repeat Step-4 and drag components inside your modal, and now we will assign prefilled data to these fields. So the idea is when the user clicks on the update button against a particular row, we will open up this modal with prefilled values.
Now right update Query and set success event handlers just like we did after insertion.
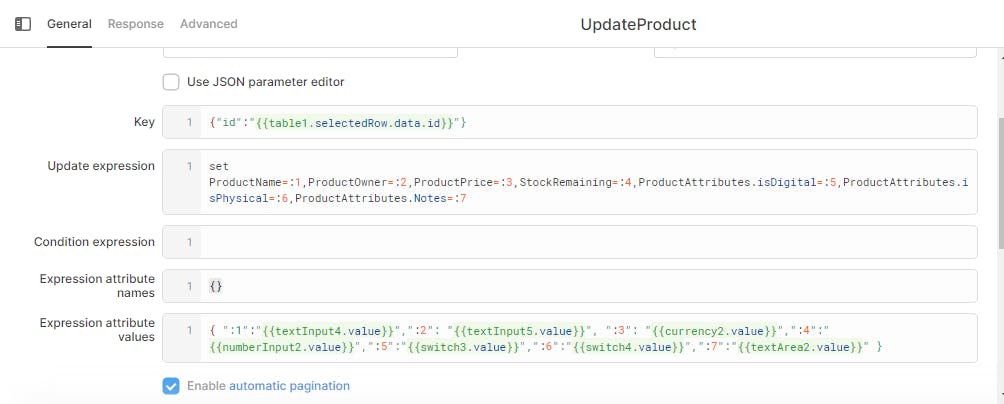
You can also use string alias instead of numbers.
Step-7 (Delete Product)
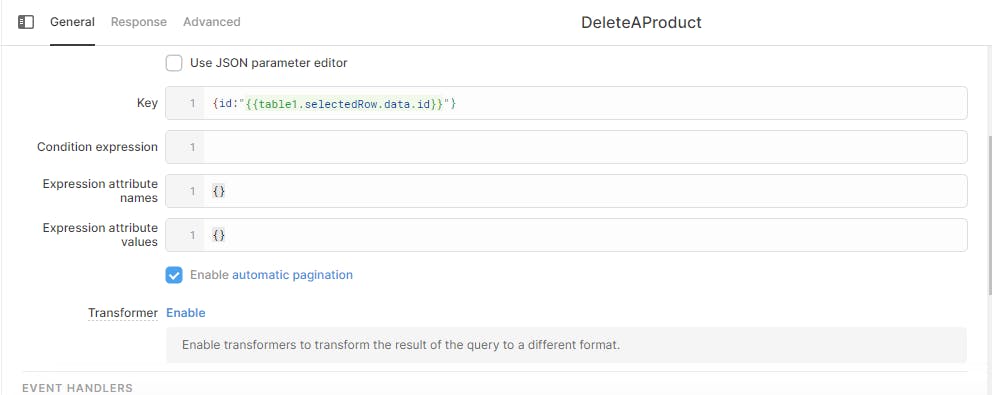
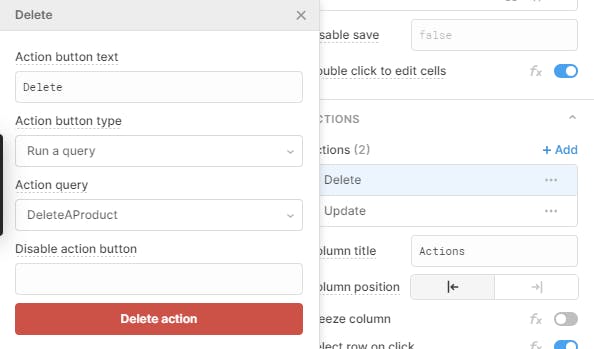
Create another action with the name Delete and write a delete query.
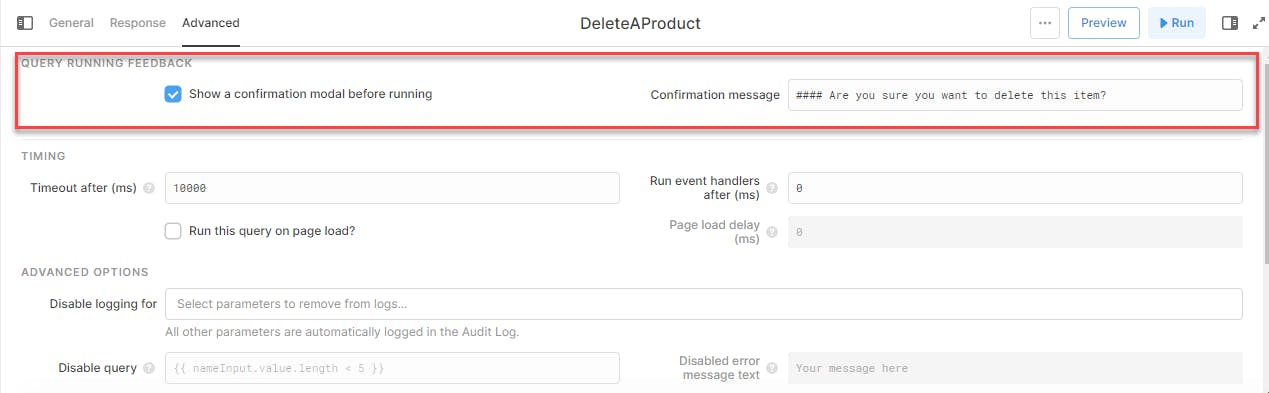
Also, check the confirmation modal under the Advanced tab and write a message for the user.
Now bind this Query to your Action.
Conculsion
Retool is a potent tool for creating internal tools. You can see that the most time-consuming tasks like database integration, data manipulation, and event handlers, you can handle these development features very elegantly. Feel free to share this article. I'm available for any Retool consultation and development. Thanks for reading !! Alright! If you liked this article, kindly give likes and comments on the best part you wanted about this article.